Event Badge Design Guide: How to Create Badges That Actually Work
Why Badge Design Matters
An event badge is not just an ID card. It is a networking tool, a security measure, and a piece of event branding that every attendee wears for the entire event. A good badge makes it easy to start conversations ("I see you're from Acme Corp -- we've been meaning to connect"), identify roles at a glance ("the blue badges are speakers"), and verify that everyone in the room is supposed to be there.
A bad badge -- small text, cluttered layout, no visual hierarchy -- forces people to squint at each other's chests awkwardly and makes the whole event feel less professional. Given that badge design takes about 30 minutes to get right, there is no reason to get it wrong.
The Three Functions of a Badge
- Identification: Who is this person? Their name, company, and role should be readable from 3-5 feet (1-1.5 meters) away during a standing conversation.
- Differentiation: What type of attendee are they? Color coding, badge shape, or ribbon attachments help people quickly distinguish speakers, sponsors, staff, and general attendees.
- Functionality: Does the badge do anything beyond identification? A QR code enables session scanning, lead capture, and digital contact exchange. A barcode can work with access control systems.
Badge Sizes and Formats
Thermal Labels (Direct Thermal Printing)
Thermal labels are printed on-demand at check-in using thermal printers like the Zebra ZD421 or Brother QL-820NWB. The label is peeled from a roll and stuck onto a lanyard insert or worn directly as an adhesive badge.
Common sizes:
- 4" x 3" (102 x 76mm) -- The standard conference badge size. Enough room for name, company, title, QR code, and event branding.
- 4" x 6" (102 x 152mm) -- Large format for tradeshows and expos. More space for sponsor logos, session schedules, or maps.
- 2.4" x 3.9" (62 x 100mm) -- Smaller format used with Brother QL-series printers. Suitable for corporate events and meetings where less information is needed.
Advantages: On-demand printing means no waste from no-shows. Last-minute registration changes are reflected instantly. No pre-printing or sorting required.
Limitations: Thermal printers typically print in black only (some models support red as a second color). Complex graphics and photos are not well-suited for thermal printing.
Card Stock (Pre-printed or Inkjet/Laser Printed)
Card stock badges are printed on a standard office printer or by a print shop. They are inserted into clear plastic badge holders attached to lanyards or clips.
Common sizes:
- 4" x 3" (A7 landscape) -- Standard size, fits most badge holders.
- Credit card size (CR80, 3.375" x 2.125") -- Smaller, used for high-security events with card printers.
Advantages: Full color printing. Photos, gradients, and complex graphics look professional. Can be double-sided.
Limitations: Must be pre-printed, which means you need the final attendee list before the event. Walk-ins and late changes require on-site printing capability or handwritten inserts. Pre-printed badges need to be sorted alphabetically, which takes significant staff time for large events.
Lanyards and Badge Holders
The badge holder is as important as the badge itself:
- Clear vinyl pouches with lanyards -- the most common option. Inexpensive ($0.50-$2.00 each). Available in standard sizes. Lanyards can be branded with event or sponsor logos.
- Clip-on holders -- attach to shirt pockets or collars. Preferred for events where lanyards are impractical (lab tours, manufacturing facilities).
- Adhesive badges -- peel-and-stick thermal labels worn directly on clothing. No holder needed. Best for short events (2-4 hours) where the badge does not need to last all day.
Essential Badge Elements
Every badge should include these four elements, arranged in order of visual priority:
1. Name (Largest Element)
The attendee's name is the primary purpose of the badge. It should be the largest text on the badge -- large enough to read from 3-5 feet away during a standing conversation. For a 4" x 3" badge, use 24-36pt font for the name. First name can be even larger if you want to encourage first-name conversations.
Practical considerations:
- Allow for long names. "Alexandros Papadopoulos" needs more horizontal space than "Amy Li." Set a maximum character count and test with long names during design.
- Decide on name format: "First Last" is standard for Western events. For Asian events, family name first may be appropriate. Some events show first name large and last name smaller underneath.
2. Company / Organization
The company name is the second most important element for networking. Display it directly under the name in a slightly smaller font (16-20pt). At conferences, people often introduce themselves by company first: "I'm with Stripe" or "I'm from Johns Hopkins."
3. Role or Title
Job title helps attendees gauge seniority and relevance for conversations. Display it below the company name in a smaller font (12-14pt). Keep it to one line -- if someone's title is "Senior Vice President of Global Enterprise Strategy and Innovation," truncate it or use the abbreviated version.
4. QR Code
A QR code tied to the attendee's registration record serves multiple purposes:
- Session check-in (scan at room entrances)
- Lead capture (sponsors scan attendee badges at booths)
- Digital contact exchange (scan to receive the attendee's contact info)
- Meal and resource tracking
Place the QR code in a consistent location -- bottom-right or bottom-center works well. Size it at least 20mm x 20mm (about 0.8" x 0.8") for reliable scanning.
Optional Elements
Add these based on your event's specific needs. Each additional element competes for space, so be selective.
- Event logo: Reinforces branding but takes space. Keep it small (top of badge) and do not let it compete with the attendee's name.
- Sponsor logos: Premium sponsors sometimes pay for logo placement on all badges. Limit to 1-2 small logos at the bottom of the badge. More than that looks cluttered.
- Color-coded stripe or background: A colored bar at the top or bottom of the badge that indicates attendee type. Far more effective than text-based role labels for quick identification at a distance.
- Pronouns: Increasingly common at professional events. Display as small text near the name: "(he/him)" or "(she/her)." Make this an optional registration field.
- Social media handle: Useful at tech conferences and community events. Display the attendee's Twitter/X handle or LinkedIn URL. Can also be encoded in the QR code.
- Session track or table assignment: For multi-track conferences, showing the attendee's selected track helps with wayfinding. For gala dinners, include the table number.
- Dietary indicator: A small icon (leaf for vegetarian, wheat-cross for gluten-free) helps catering staff at meal service. Only add this if your catering team will actually use it.
Design Tips for Readability
The 3-Foot Rule
If you cannot read the attendee's name from 3 feet (1 meter) away, the font is too small. Print a test badge, hang it on a lanyard around someone's neck, and step back. Can you read the name comfortably without leaning in? If not, increase the font size and reduce other elements to make room.
Font Hierarchy
Use a clear size hierarchy so the eye knows where to look first:
- Name: 24-36pt, bold
- Company: 16-20pt, medium weight
- Title: 12-14pt, regular weight
- Other info: 10-12pt, light weight or gray
Do not use more than 2 font families. One sans-serif font at different weights and sizes is usually all you need. Work Sans, Inter, Helvetica, and Arial all work well for badges because they remain legible at various sizes.
Contrast
Black text on a white or light background is the most readable combination. Avoid light text on dark backgrounds for the name and company -- it reduces legibility, especially in dim conference halls. If you use a colored header or footer bar, keep the main text area high-contrast.
White Space
Resist the urge to fill every square millimeter. White space around the name makes it stand out. A badge with generous margins looks more professional than one crammed with information. If you cannot fit everything, remove the least important element rather than shrinking everything.
Orientation
Landscape orientation (wider than tall) is standard for conference badges because it gives more horizontal space for long names. Portrait orientation works for smaller badges or events where vertical lanyard display is preferred. Choose one and be consistent across all badge types.
Color Coding Strategies
Color coding is the most effective way to differentiate attendee types at a glance. When done right, anyone can identify a speaker, sponsor, or staff member from across the room.
Common Color Assignments
- Blue: General attendees (the largest group -- use a neutral, professional color)
- Red or orange: Staff and organizers (high-visibility so attendees can find help easily)
- Green: Speakers and panelists
- Gold or yellow: VIPs, board members, or executive attendees
- Purple: Sponsors and exhibitors
- Gray or silver: Media and press
How to Apply Color
There are several ways to add color to badges:
- Colored stripe at the top or bottom: Works with both thermal and inkjet printing. A 10-15mm colored bar is visible from a distance and does not interfere with text readability.
- Colored lanyard: The lanyard itself is color-coded (blue lanyards for attendees, red for staff). This is the easiest method and works even with single-color thermal printing. Order lanyards in bulk by color.
- Colored badge holder: Clear holders with colored borders or trim. Less common but effective.
- Full background color: The entire badge background is colored. This is the most visible but can reduce text readability if the color is too dark.
Keep the System Simple
Use no more than 4-5 colors. If you have 8 attendee types, group related types under one color (all sponsor-related roles get purple; all content-related roles get green). Post a color key at the entrance so attendees understand the system. Include the color legend in the event app or printed program as well.
With Micepad's badge design tool, you assign colors to attendee types in the template editor. When a badge prints at check-in, the correct color is applied automatically based on the attendee's registration type.
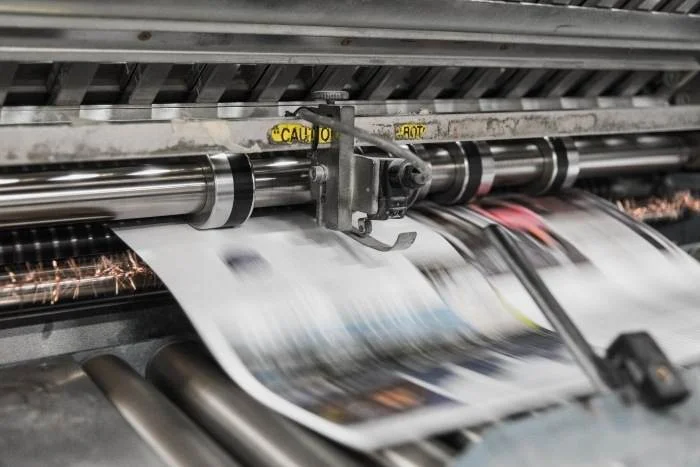
Printer Compatibility: Thermal vs Inkjet
Thermal Printers (Recommended for On-Demand Printing)
Thermal printers use heat to create images on specially coated label paper. No ink cartridges, no toner -- just label rolls. This makes them reliable and fast, with virtually no consumable costs beyond the labels.
Zebra ZD421: The workhorse for event badge printing. Prints up to 200-300 badges per hour. Supports 4" wide labels. Connects via USB, Ethernet, or Wi-Fi. Compact enough for a registration desk. Typical cost: $400-$600.
Zebra ZD621: Higher-end model with faster print speed and a color touchscreen display. Better build quality for high-volume events. Supports 4" wide labels. Typical cost: $600-$900.
Brother QL-820NWB: Compact printer that supports labels up to 2.4" (62mm) wide. Good for smaller badges and corporate events. Wi-Fi and Bluetooth connectivity. Lower cost: $200-$300.
Brother QL-1110NWB: Supports wider labels up to 4" (102mm). Full-size badge printing from Brother's lineup. Wi-Fi, Bluetooth, and USB connectivity. Typical cost: $250-$400.
Thermal limitations: Most thermal printers print in black only. Some Zebra models support a second color (red) with special dual-color labels, but full-color printing is not available. This means color coding on the badge itself requires pre-printed colored inserts or colored lanyards rather than printed color blocks.
Inkjet and Laser Printers
Standard office printers can produce full-color badges on card stock. This is best for pre-printing badges before the event.
Advantages: Full color, photos, gradients, and complex graphics. Double-sided printing. Uses standard card stock or label sheets.
Disadvantages: Slower than thermal printers for individual badges. Ink smudging if badges are not handled carefully. Not practical for on-demand printing at the check-in desk because of speed and paper handling.
Choosing the Right Approach
- On-demand at check-in: Use thermal printers. They are fast, reliable, and purpose-built for label printing. No waste from no-shows.
- Pre-printed before the event: Use inkjet or laser printers (or a professional print shop) for full-color badges. Plan for 20-30% extra to cover no-shows, misprints, and last-minute additions.
- Hybrid approach: Pre-print VIP and speaker badges in full color for a premium feel. Print general attendee badges on-demand via thermal printer at check-in. This gives VIPs a distinguished badge while keeping operations efficient for the majority of attendees.
Common Badge Design Mistakes
Too Much Text
The most common mistake is treating the badge like a business card and cramming it with information. Name, company, title, email, phone, three sponsor logos, the WiFi password, and the event hashtag all on a 4" x 3" badge. The result is unreadable noise. Limit content to name, company, title, and QR code as the baseline. Add other elements only if they serve a clear purpose.
Small Font for the Name
If the event logo is 24pt and the attendee's name is 14pt, your priorities are backwards. The attendee's name is the single most important element. Make it the largest text on the badge. The event logo can be small -- everyone already knows what event they are at.
No QR Code
A badge without a QR code is a missed opportunity. The QR code enables session tracking, lead capture for sponsors, and digital contact exchange. Without it, you are stuck with manual methods for all of these functions. Every badge should have a QR code, even if you are not sure you will use all of its capabilities.
No Color Coding
If all badges look identical, there is no way to visually distinguish attendee types. Speakers cannot be recognized by other attendees. Staff members are invisible when someone needs help. Exhibitors blend in with general attendees. Even a simple two-color system (general attendees vs. staff/speakers) makes a meaningful difference.
Ignoring Long Names
Test your badge template with the longest name in your attendee list. If "Dr. Sivasubramanian Chandrasekaran" overflows the name field or wraps to three lines, adjust the template before the event. Auto-shrinking text is better than truncation, but both should be tested.
Forgetting the Back Side
Badges flip constantly. If the back is blank, half the time your badge shows nothing useful. Options for the back: print the same information on both sides (guarantees readability regardless of flip), or use the back for event information (Wi-Fi credentials, venue map, emergency contacts, hashtag). Double-sided printing is standard with inkjet/laser and available on some thermal printers with duplex capability.
Not Testing with Actual Hardware
A badge template that looks perfect on screen may print differently on a thermal printer. The print resolution, margin handling, and character rendering can all differ from the screen preview. Always print 5-10 test badges on the actual printer you will use at the event. Check alignment, readability, QR code scannability, and that the design fits within the printable area of the label.
Good badge design is a small investment that pays off throughout the entire event. Spend 30 minutes getting the layout, hierarchy, and color coding right, test it on the actual printer, and your attendees will have a professional, functional badge that makes networking easier and your event operations smoother.
Micepad Team
Micepad - Enterprise Event Management Software